Wednesday, April 28, 2010
Ready Set Vignette
I wanted to join Beth's "Ready Set Vignette" party at "The Stories of A to Z", which she probably pronounces "Zee" and I pronounce "Zed", being Canadian and all. So here goes:
This is the buffet in my dining room. I wanted it to look beachy and cottagey, because I'm in that kind of mood -ready for summer!
I kept the colour fairly neutral, lots of beiges, browns and some whites to brighten things up. Here is a close-up:
And because, as the songs says, "the best things in life are free", here's a breakdown of the vignette.
1. Old weathered window: birthday gift from hubby (at least 10 years ago) = $free!
2. Buffet: another birthday gift, this one from my mother-in-law, back when Jack and I were
newlyweds = $free! (I love birthdays!)
3. Silver Mint Julep Cup -can't remember where I got it, but I DO remember that I paid $9.99
for it. So it was expensive. ;p And I still have never had a Mint Julep. Better put it on my "Bucket List"! Flower was a gift to the Horsey Girl from her boyfriend, which I commandeered for this photo. heh, heh, heh.
4. Urn and glass pebbles: Sears, around 6 years ago for $20 bucks.
5. Books: old, Birds: belonged to my mom - she got them at an art exhibit in Kenora, Ontario in the 70s. She LOVED, LOVED, LOVED them. And so do I.
6. Starfish: from our Mexico trip this Christmas: $100 pesos (about $1).
7. Best for last: the wonderful shell ball that I bought for moiself in Saskatoon at the greatest store - Modern Country Interiors. I love everything they sell! I think I paid around $25 for it. I often wish I could get to Saskatoon more often, and not just to see my wonderful family there!
So there you have it- my vignette.
Hope you enjoyed it!
Nadine
Tuesday, April 27, 2010
A Mini-Project
The weather here in central Canada has been unseasonably warm. So I thought I'd tackle a little (outdoor) eyesore that has been bugging me ALL winter.
When we moved in, the front of the condo had a large (and by large, I mean huge) cedar that was overtaking the entrance. I love trees, and the thought of losing this cedar did not sit well with me, but this tree was so overgrown, it had become a safety issue. The tree hid the front light AND the house numbers. The kids work until dark many nights, and I found that worrisome. Also, if we HAD to call 911 the ambulance would have a tough time finding us. Then Jack mentioned that the tree was big enough for a creepy bad guy to hide behind. This thought totally freaked me out. (Not his intention, but I have a vivid imagination).
So I called up the management company who discussed the situation with the Board (apparently for months) and they finally decided to have the tree cut down. In November.
Now with the tree gone, I could see the lousy job of painting the handy men did when they painted the railings. In fact, they painted AROUND the tree instead of MOVING the branches. Seriously. Totally. Unacceptable.
In November, it was too cold to repaint, so although I was assured the handymen would repaint the railings as soon as the weather would cooperate, I had to suffer through months of the unpainted look.
It drove me crazy. And it has now been warm enough to paint outdoors for weeks. I couldn't wait any longer.
So, I took matters into my own hands.
Jack and I headed down to our local McDiarmid store, where they can colour match anything. I took my little piece of peeled-off paint chip. And they matched it perfectly.
Here is my paint can and my favourite paint brush.I use a 2-1/2 inch sash brush for most projects.
And then I painted the railings.
Happy, happy day.
Took ten minutes, tops.
And now, I can dream about the weather being warm enough in a few weeks to put out some pots of flowers!
Nadine
Sunday, April 25, 2010
B4
Here are some "Before" pics of our condo I thought I'd share with you on a lazy Sunday morning.
Last year, my husband and I had just sold our 40 acre horse ranch. We were very excited because we wanted to begin completely different lifestyle. Our kids were almost grown-up and out of the house, and we were interested in purchasing a home that would allow us to "lock the door" and play hooky without worrying about the house. My husband and I have spent our marriage buying houses and renovating them for (usually) a profit. Yes! While we were living in them! And we're still married! And this is before the phrase "flipping" was even invented. So we were looking for something that we could put our own personal stamp on. At the same time, we wanted to be able to do the work slowly (for a change). Remember, this was supposed to be a lifestyle shift.
So here's what we were looking for:
-townhouse condominium (nice little yard for moi, no yard work for him.)
-basement for secondary living space and storage
-3 bedrooms
-2 bathrooms
-if it needed redecorating, that was ok, because I would redo it anyway, even if it didn't "need" it!
The real estate market in our city is red hot. (This is Canada). We looked at a unit in the complex where we eventually bought but couldn't purchase because the sale of our former home wasn't closed yet. Offers here require NO conditions. Disappointment. But it certainly sold us on this complex. And a short month later, the condo we bought came on the market. It soon wasmine ours, all ours.
3 bedrooms? Check.
Full basement? Check.
2 bathrooms? Check.
Parking available for the 4 of us? Check.
Fireplace? Check.
Outdoor living space? Check.
And the extras!
Sunken living room. Vaulted ceiling. Unit floor plans flip front to back so living areas are never beside someone else's living area. HUGE Master bedroom with lots of closet space.
See? Perfect.
That is, the shell of the condo is perfect.
The details - not so much.
But we're not scared.
We've done it before....
Here are some befores:
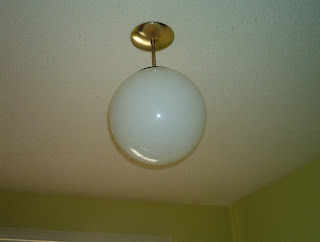
Stippled ceilings and "boob" lights. Check.
Lego-style doorbell. Check.
Kitchen floor with handy dandy pockets to attract dirt. Check.
70s style railing with holes and dents. Check.
The ubiquitous disco style hanging lights. Check.
Original bathrooms. Nasty. Check.
Different carpet in every upstairs room. Check.
The opportunity to make it our own from top to bottom. Check.
Hope you'll join us on this little journey.
Last year, my husband and I had just sold our 40 acre horse ranch. We were very excited because we wanted to begin completely different lifestyle. Our kids were almost grown-up and out of the house, and we were interested in purchasing a home that would allow us to "lock the door" and play hooky without worrying about the house. My husband and I have spent our marriage buying houses and renovating them for (usually) a profit. Yes! While we were living in them! And we're still married! And this is before the phrase "flipping" was even invented. So we were looking for something that we could put our own personal stamp on. At the same time, we wanted to be able to do the work slowly (for a change). Remember, this was supposed to be a lifestyle shift.
So here's what we were looking for:
-townhouse condominium (nice little yard for moi, no yard work for him.)
-basement for secondary living space and storage
-3 bedrooms
-2 bathrooms
-if it needed redecorating, that was ok, because I would redo it anyway, even if it didn't "need" it!
The real estate market in our city is red hot. (This is Canada). We looked at a unit in the complex where we eventually bought but couldn't purchase because the sale of our former home wasn't closed yet. Offers here require NO conditions. Disappointment. But it certainly sold us on this complex. And a short month later, the condo we bought came on the market. It soon was
3 bedrooms? Check.
Full basement? Check.
2 bathrooms? Check.
Parking available for the 4 of us? Check.
Fireplace? Check.
Outdoor living space? Check.
And the extras!
Sunken living room. Vaulted ceiling. Unit floor plans flip front to back so living areas are never beside someone else's living area. HUGE Master bedroom with lots of closet space.
See? Perfect.
That is, the shell of the condo is perfect.
The details - not so much.
But we're not scared.
We've done it before....
Here are some befores:
Stippled ceilings and "boob" lights. Check.
Lego-style doorbell. Check.
Kitchen floor with handy dandy pockets to attract dirt. Check.
70s style railing with holes and dents. Check.
The ubiquitous disco style hanging lights. Check.
Original bathrooms. Nasty. Check.
Different carpet in every upstairs room. Check.
The opportunity to make it our own from top to bottom. Check.
Hope you'll join us on this little journey.
Wednesday, April 21, 2010
Bowl'd Over
Tuesday, April 20, 2010
Wood You Paint It?
This is always a difficult subject to approach in our household. Do we **gasp** PAINT over wood??? Since Jack is working from home today, I posed the question to him. His answer - "Depends". Yeah, that was helpful.
We faced this dilemma in our condo. The sunken living room has a beautiful vaulted ceiling covered in not-so-beautiful cedar planks. Rough cedar planks. It is mentioned in the original condominium specs as a "feature". Have I mentioned the condo was built in the 70s? The original finish was NOT in very good condition. I'm sorry that I do not have a "before" picture to show you; it was too horrific and there is always a chance small children may see this blog.
So here were our options:
1. Lightly sand and restain. Did I mention the ceiling is vaulted? Very, very vaulted?
2. Paint a feature colour.
3. Paint white.
4. Keep talking about it long enough to decide to move thus avoiding actual decision-making.
Number 4 was sounding pretty good to me, but I just couldn't face looking at that ugly ceiling that didn't match ANYTHING in the room.
So, onto Number 1A. Stain in a dark colour. Pros: Wood is beautiful and a dark stain would modernize the look. Cons: Room faces east and is quite dark.
Option 1B. Stain white. Pros: Cottagey, casual. Cons: Maybe a bit too casual for our look.
Both Options 1A and 1B would require either a professional painter and/or scaffolding. Husband is afraid of heights. I scoff at paying someone to do something I can do myself. I blame my parents for this flaw in my personality. Goodbye staining.
Option 2. Quickly rejected. This solution needed to be a long-term one. NOT gonna paint every time I want to change my living room furniture. Which is often. Another personality flaw.
Option 3 - Definite possibilities here. White is light, bright, would cover up most of the planks but leave enough of the texture to keep the ceiling a feature in this room.
So, (drum roll please) what did we end up doing?
Surprise! We painted the planks in the wall colour! Benjamin Moore Gentle Cream OC-96 in eggshell. It LOOKS white. Even compared to the walls! And we didn't even have to cut in! Bonus!
So HOW did we do it? We used a very fuzzy roller, designed for rough surfaces, a heavy-duty primer to block the (remaining) stain, a paintbrush duct-taped to an extender pole, an extension ladder, a step ladder and lots of drop sheets.
After one coat of the primer, it only took one coat of paint! Love you, Aura!
Here are some pictures:
Gotta love the "Macgyver-ed" brush.
More on that chocolate brown feature wall later.
And the finished product.
Love it. Will share the completely finished room when the room is, well, completely finished.
Nadine
We faced this dilemma in our condo. The sunken living room has a beautiful vaulted ceiling covered in not-so-beautiful cedar planks. Rough cedar planks. It is mentioned in the original condominium specs as a "feature". Have I mentioned the condo was built in the 70s? The original finish was NOT in very good condition. I'm sorry that I do not have a "before" picture to show you; it was too horrific and there is always a chance small children may see this blog.
So here were our options:
1. Lightly sand and restain. Did I mention the ceiling is vaulted? Very, very vaulted?
2. Paint a feature colour.
3. Paint white.
Number 4 was sounding pretty good to me, but I just couldn't face looking at that ugly ceiling that didn't match ANYTHING in the room.
So, onto Number 1A. Stain in a dark colour. Pros: Wood is beautiful and a dark stain would modernize the look. Cons: Room faces east and is quite dark.
Option 1B. Stain white. Pros: Cottagey, casual. Cons: Maybe a bit too casual for our look.
Both Options 1A and 1B would require either a professional painter and/or scaffolding. Husband is afraid of heights. I scoff at paying someone to do something I can do myself. I blame my parents for this flaw in my personality. Goodbye staining.
Option 2. Quickly rejected. This solution needed to be a long-term one. NOT gonna paint every time I want to change my living room furniture. Which is often. Another personality flaw.
Option 3 - Definite possibilities here. White is light, bright, would cover up most of the planks but leave enough of the texture to keep the ceiling a feature in this room.
So, (drum roll please) what did we end up doing?
Surprise! We painted the planks in the wall colour! Benjamin Moore Gentle Cream OC-96 in eggshell. It LOOKS white. Even compared to the walls! And we didn't even have to cut in! Bonus!
So HOW did we do it? We used a very fuzzy roller, designed for rough surfaces, a heavy-duty primer to block the (remaining) stain, a paintbrush duct-taped to an extender pole, an extension ladder, a step ladder and lots of drop sheets.
After one coat of the primer, it only took one coat of paint! Love you, Aura!
Here are some pictures:
Gotta love the "Macgyver-ed" brush.
More on that chocolate brown feature wall later.
And the finished product.
Love it. Will share the completely finished room when the room is, well, completely finished.
Nadine
Monday, April 19, 2010
How to Fill A Blankety-Blank-Blank Wall
What to do with a blankety-blank-blank wall? Fill it up, of course!
Here is the before picture - a huge void in the breakfast area of my kitchen. First a view to the stairs, and secondly, a view to the window.
Luckily (for you), I have spared you the horror of what the original wall looked like when we moved in. Let's just say I can sum it up in in two words: dusty rose. Shudder. We painted it in Benjamin Moore OC-96 Gentle Cream in one-coat Aura paint. It took 2 coats to cover - but I do NOT hold that against Aura. Really, when was the last time someone painted a wall in dusty rose? Twenty years? At least!
But I digress.
I felt the wall could hold three large pieces of art. But, I didn't have a piece of art large enough to "hold" the wall. (Think mural size!) I DID have a large print, already framed that was left behind in my sister's former house. She didn't like it. I did. It's been with me ever since. Heh heh heh. Evil laugh.
Here is a shot of that print.
Lots of watery greens and blues. Very tranquil.
I had also collected many postcard-sized prints over the years. There was a distinctly "blue" theme that connected them. Funny how that can happen. So I decided to treat the six prints as one large piece of art. I found six identical frames (including mats) for $2 each at Walmart. I love that! Here is the arrangement on the ground. I fooled around with it til I got a pleasing layout.
Just love the cords and the vacuum cleaner hose in the picture. That's because I'm going to be cleaning right after this. I really am.
So I started putting
And here they are (FINALLY) on the wall:
Credits: (Top Left) Print by Group of Seven painter Lawren Harris, (Top Right) Print of The Del Coronado Hotel in San Diego where we visited in June by Gurven, (Middle Left and Lower Right) Prints of Kenora, Ontario by Marya Zajac, (Middle Right) Print of Dacotah, Manitoba elevator by Nichelle Desilets and (Bottom Left) Print of Saskatchewan sky by H.K. Ripplinger.
And now for the right side of my anchor piece, I chose 2 pieces, also with special personal meaning.
The top photo was taken by my husband at my parents' cottage on Storm Bay in Ontario. It was a beautiful sunrise. The bottom photo is a very old aerial view of the farm in Saskatchewan where my dad grew up.
So, here is the finished wall.
A beautiful view for my morning coffee and bagel.
And the cost for my own personal art gallery?
(Left) 6 postcard prints, all $5 of less = $30
Frames with mats, 6 x $2= $12
(Middle) Large anchor piece = Free!
(Right) Framed photos - Gifts (also Free!)
The total is $42! The enjoyment, however, is priceless.
Nadine
Friday, April 16, 2010
I'm a Stalker
A real-estate stalker, that is.
And since today is Friday, you know what that means: time to troll the internet sites and The Real Estate News newspaper for Open Houses! I'm not really interested in actually moving, but I do so love looking at other people's decorating. My husband definitely does NOT enjoy looking at other people's homes like I do. I can only get him to spend a Sunday afternoon with me if he owes me. Big time. Like the time I had to attend the (most boring ever) boat show. Oh yeah, he went Open Housing that time.
This weekend is especially exciting because a neighbour in our complex has put their unit on the market and this Sunday their Realtor is hosting an Open House! This particular unit happens to be the same floor plan as ours. Even better. Since the unit is listed for $15,ooo more than we purchased ours only a year ago, I MUST compare them. Strictly for investment reasons only, of course. ;)
As well, our
See you there!
Nadine
Wednesday, April 14, 2010
I See a Red Door and I Want it Painted Black
With apologies to the Rolling Stones, it was actually fake plastic wood doors throughout my condo that I wanted banished from my world. With all due respect, not even Mick and the boys could make these doors look cool. Here's what they looked like before (please note that I did not pick this paint colour - it was existing):
Here's a close-up just in case you couldn't live without a close-up view of fake wood grain:
Gorgeous. Not.
So I considered replacing them all with something like these from the Home Depot:
But the odd-sized doors in our 70s condo precluded that that could happen easily. The DIY-er in me jumped to attention and I realized I could paint them. Now I have (mostly) lived in older and cottage-style homes so I have always painted my trim in a soft cream. I absolutely love the look of large moldings painted out white. But I also realized our new home, with its flat-paneled doors and tiny trimwork wouldn't suit that look.
Luckily, my son, The Creative One, unwittingly came to the rescue. He decided he wanted to paint his chest of drawers. He's a young guy, so can you guess what colour he picked??? You're right! He picked black! Lightning bolt! I could ALSO paint my doors black!
So we headed down to my favourite Benjamin Moore retailer; you can find them here.
They were extremely helpful and offered us their Aura paint because it is self-priming and has low VOCs which is good for the environment. It also will cover ANYTHING. The clerk even called the Benjamin Moore 1-800 number to make sure I could paint my plastic doors WITHOUT priming them first. She's a star! And, it turns out, I could!
So, The Creative One liked the colour called "Onyx" (BM2133-10). We decided on a semi-gloss. Despite the name, the colour is actually a deep gray/black with a lot of depth. And now my doors look like this:
Even Amelia likes them!
I love the results! More on the OTHER issues in this upper hallway (like railings, art, knobs) in later posts!
Have a great day!
Nadine
Tuesday, April 13, 2010
Easter Dinner
A little late perhaps, but I wanted to share some photos of our Easter dinner tablescape with you!
Since moving from our farm to a condo has constituted some space restrictions, our dinner was much less traditional than in previous years. (Plus, the Creative One said he hated ham AND salmon)! So, apparently, does the Horsey Girl. Jack-of-All-Trades will eat anything I put in front of him because he knows what's good for him! So, anyhoo, I ended up making a pork tenderloin, two (yes, two) salads, baked rice, asparagus, buns and for dessert, a HUGE fruit tray and cupcakes. The cupcakes were courtesy of the Horsey Girl (sheepish smile).
But first I had to polish the silverware.
And my finger apparently.
And here I am preparing to set the table.
Ta Da! Here is the final tablescape! Photo courtesy of Jack. Thanks, Jack. I love you.
Blue Mist china by Aynsley (now defunct - yes, that's how long ago my wedding was), silverware - antique pattern called Birds of Paradise, collected for me by my mother-in-law, Mila crystal by RCR, now defunct (see comment above), napkins and tablecloth by Superstore, and tulips by Safeway. Birds (blue, from Wal-Mart years ago, and crystal one by Swarovski - talk about mixing it up!)
A good time was had by all! But don't forget the Easter baskets! (Even though the youngest is 20 years old). ;)
Nadine
Monday, April 12, 2010
What I learned from my Mom about Interior Decorating
My mom and the Horsey Girl.
My mom would have been 70 years old today. Unfortunately, she left us prematurely and suddenly in 2001. My mother was an original Martha Stewart. She knew how to bake and cook like a professional, her home was always a showplace, and she was the glue that kept her family together.
While we have all drooled over beautiful homes in glossy magazines, my mom taught me that some things in interior design are more important than what your furniture looks like, and I am going to share them with you...
1. Never underestimate the importance of cleanliness to interior design.
Ever seen a dirty, messy room in a magazine? Of course not. Wall colour, flooring, furniture placement all would seem less important in a messy room. My mom was such a neat freak that we kids called her "The Glove", which we shortened from "The White Glove". True story. I have often seen unironed tablecloths in national design magazines! I mean, seriously. I'm sure it is my mother's voice that is making me cringe over that detail. A neat and tidy home is an oasis from the world. Cluttered home, cluttered mind, yadda yadda yadda. (The Horsey Girl just came in and pointed out a dust bunny under the table where I'm typing this. Oops.) This leads to...
2. Take care of the little things.
This means maintenance. Touch up paint. Change the furnace filter. Hammer in that nail that has sprung out for no reason. A well-cared for home shows pride of ownership. Plus, if you ever decide to move, the small jobs aren't overwhelming! My father's career involved a lot of moves over the years, and my parents had to sell a lot of houses over that time. Makes it much easier to put the house on the market if there aren't a bunch of repair jobs to deal with which makes your house look run down and, consequently, get a lower offer on it. Photo credit: here
3. Keep the background neutral.
This definitely was important to my mom because of all the moves (who wants to repaint every year or 2 any way?) However, it is easy to update and modernize your look with accessories - much more affordable with a neutral floor covering and walls. Take a look a this photo as an example! The floors are a neutral dark wood and the walls are white, but this room looks blue. Photo credit: House Beautiful
And finally...
4. People should feel welcome in your home.
A house is not a home without good food, family and laughter around. And wine. Especially wine. So, here's to you, Mom. Happy Birthday. Wish you were here.
Subscribe to:
Posts (Atom)